Showing posts with label Apps. Show all posts

Sunday, September 13, 2015

Cloud TV APK

Date:  Sep 13, 2015

This APK can be installed on any Android TV Set Top box, i.e. Xiaomi, FireTV, 10Moons, TMall, Minix, etc etc.

IMG 9948

You can pay for your content using this App, if you want to.

IMG 9953

The cost of it is from US$48 to $80 like that depending on which package you want to subscribe.

IMG 9954

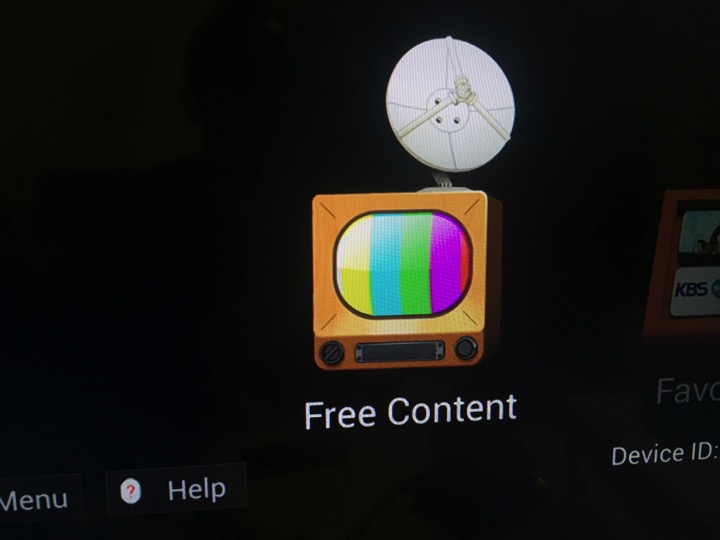
For me, I just use the FREE CONTENT.

IMG 9951

There are just too many channels to browse.  So, one way to make it simple is...

GO TO AREA menu.

IMG 9956

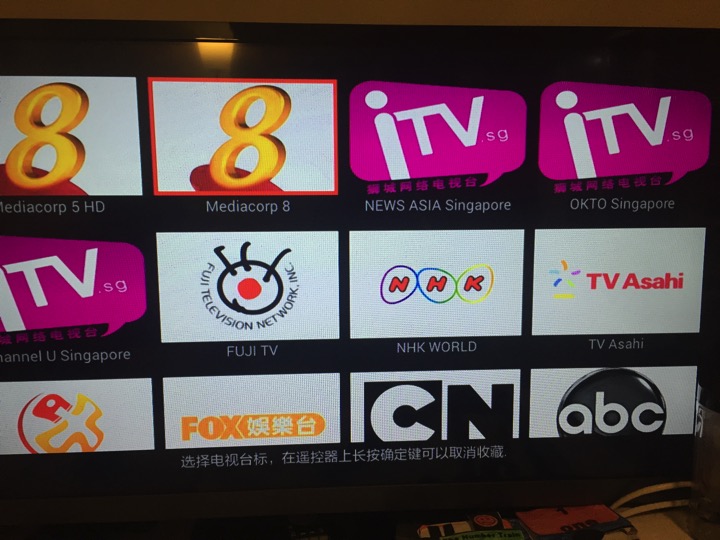
SELECT Singapore.

It will list out the available Singapore Channels.

IMG 9957

SELECT any channel you want to watch.  For example Mediacorp 5 HD.

IMG 9958

Make sure you can run that channel with no problem, no delay, decent speed, and picture quality is good or acceptable.

IMG 9959

Then, you go back to the channel listing, select that channel again, and HOLD your OK button on your remote.  Once you HOLD long enough, it will say “OK, this channel is in your favourites”.  So, you have just added a channel into your favourite folder.

So, you continue do this and adding those channel that works.

Go different country.  Like Malaysia, Hong Kong, United States, United Kingdom, and so on.

IMG 9961

This is my Favourites folder.

IMG 9952

I have all the Singapore channels, some Japanese TV channels.

IMG 9931

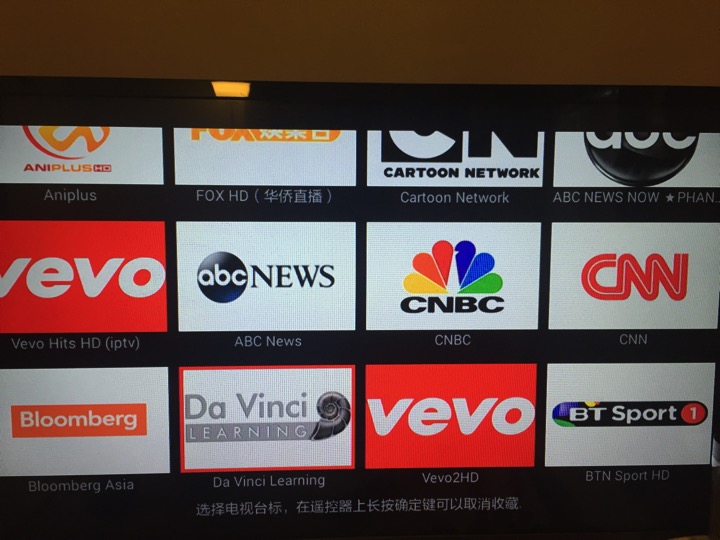
I have ABC, CNBC, CNN, Bloomberg.  Also BT Sport.

IMG 9932

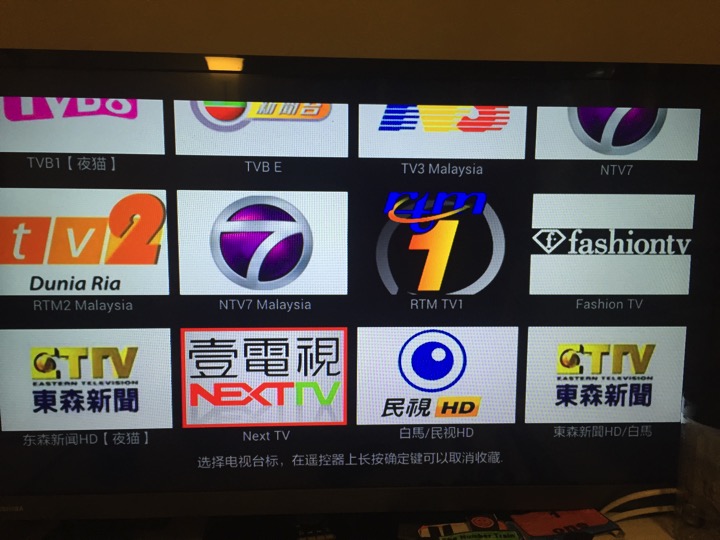
I have Hong Kong TV Channels and Malaysia TV Channels.

IMG 9933

Malaysia & Taiwan Channels.

IMG 9934

I also have some China TV channels. 

IMG 9935

Nowadays, I found no much different in terms of the performance from the pay content and the free content.

Some times these free contents will come and go.  But it is good enough.

At least I have a way to watch Singapore channels.

You got to have patient in browsing thru all your channels and pick the one that run best on your Internet Service Provider.

Not all channels work the same on different ISP.

So, depend on the ISP your have, you might have a total different list of channels that work best for you.

This is only one of the APK I have for watching live TV.

Tuesday, April 14, 2015

The New Photo App - My Experience So far

Date:  Apr 14, 2015

[Update]  Correction on Item 18.  I was inside “iPhoto Events” album within my Album under the new Photo App.  That is why all the Events are listed there.  Heng ah!

Last week, when you update your MacOS to 10.10.3, the new Photo app is finally available.

Apple has decided to replace iPhoto with the new Photo app.

They promise it will be faster, easier, and more make sense features.

So far, my experience is a bit disappointed.  There are some good features, but the pay off may be too big.

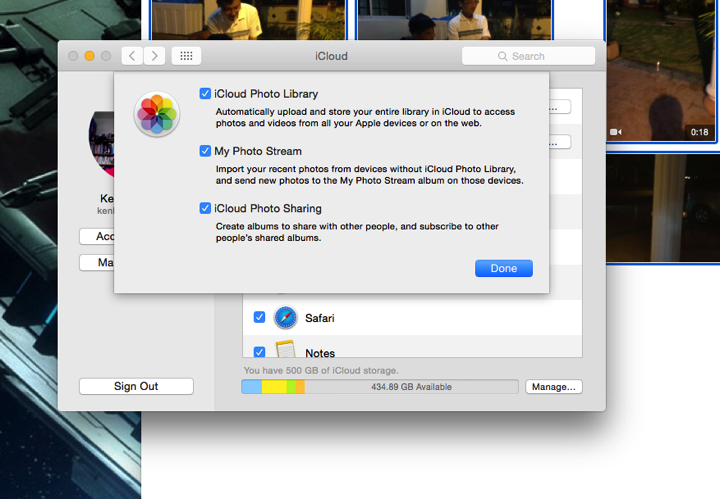
1.  There is this great feature.  You can now “upload” all your originals photos onto the iCloud.  Go to “Systems Preference”, “iCloud”, “Photo” and choose option, you will be given the option “iCloud Photo Library”.  Simply tick it, they will move your Photo Library onto iCloud.
Screen Shot 2015 04 14 at 5 32 58 am

2.  Before you do so, please check how much storage is your iPhoto Library or Photo Library.  If you are using a laptop/Macbook Air, most likely you have very few hard disk space, so you need to a) make sure you have space to migrate the iPhoto Library into Photo Library.  b) make sure you have enough iCloud storage space.  For me, I have to subscribe to the 500Gb iCloud. (You can cancel it any time).  If you are using iMac, you probably may want to check on your hard disk space too.  If you upgrade your iMac to SSD drive or Fusion drive, it is likely you do not have enough hard disk space too.  So, you got to do all these research before you migrate.

3.  Then, you launch the photo app, and go thru the migration.  After done, you go to Photo app preference.  There, under iCloud, you can select “Optimise Mac Storage”.  Or if you have the hard disk space, you can select “Download Originals to this Mac”.  For me, I am using SSD, so, I have to conserve whatever space I have.  Especially when my iPhoto Library is > 350Gb big.  When you choose this option, only “Thumbnail” photo will be downloaded onto your iPhone, iPad, or iMac.  When you select the photo, there will be a small percentage circle at the bottom right of the photo.  That means the photo is being downloaded, by how many percent.   

Screen Shot 2015 04 14 at 5 33 07 am

4.  My original iPhoto Library is 376.53GB.  After I migrated to Photo Library, it creates another library which is 438Gb big.  And I wonder what are the extra thing that is being created.  After I done that, I left with lesser than 10Gb on my SSD hard disk.  So, I got to get rid of the iPhoto Library.  So, I make a backup and move it to the Trash.  And I empty the Trash.  But after I have done so, my SSD hard disk reported on 75Gb hard disk.  ???? I deleted a 376Gb folder, and I only recovered back 60Gb space?  Something is fishy going on here.  But we will soon find out what is it.  I am still investigating this.

Screen Shot 2015 04 10 at 5 49 25 am

5.  So, I looked into the Photo Library folder.  I found a new “resources” directory that has 100Gb of space.  So, they created a “Moment” thumbnail files here.  That’s the extra 100Gb+ went to.

Screen Shot 2015 04 10 at 5 55 25 am

6.  I did a full scan of my system, and I have yet found where is my missing disk space.  Very mysterious.  At of this stage, I am missing of 300Gb of hard disk space.  Where does it go?  Where does it hide?    

Screen Shot 2015 04 14 at 6 03 17 am

7.  So, I keep using the tools to find what happen?  But It seems perfectly fine.  So, at the first place, how did Photo App converted or migrated my 367Gb photos given that my total space is 1Gb?  I really don’t want to think about it now.  hahaha.  It is so strange.  

Screen Shot 2015 04 14 at 6 09 04 am

8.  I checked again my backup drive, and it does have a full 376Gb old iPhoto Library on it.

Screen Shot 2015 04 14 at 6 14 09 am

Let’s don’t talk about that painful migration thingy… Let’s focus in some other things...

9.  You can add more share options now.  I love the “Evernote” add on.  So that I can now select any photos that I want to keep inside my Evernote.  

Screen Shot 2015 04 09 at 9 30 40 am

10.  I love that you can add Title, Descriptions, and Tag.  This is important, because, once you can do that, you can search for your photos.

Screen Shot 2015 04 10 at 6 01 40 am

11.  To delete photos now seems to be much much slower.  Once you selected the photos and you want to delete them, it usually takes 1-2 seconds to delete them.  Not sure why is it like that.  I am doing this on a SSD, so, I can imagine, doing it on the hard disk may be a bit slower too.

Screen Shot 2015 04 10 at 9 16 58 am


12.  After you select photos to delete, a Delete dialog will come up.  

Screen Shot 2015 04 10 at 9 17 34 am

13.  After I have turn on the “iCloud iPhoto Library”, my Photo app trying to upload my entire library onto the iCloud.  And after 2 days, it successfully uploaded about 3000 photos onto the iCloud.  Wait a minute, that is awfully slow!  I have 108K photos to upload, and it only uploaded 3K photos?  Let me calculate, that will takes almost 36 days to upload the entire library.  hahahahaha

Screen Shot 2015 04 14 at 5 49 37 am

14.  After I have turned on the iCloud Library, only iMessage can successfully attached the photos in my photo library without any problem.  That is because iMessage is Apple stock program/app.  Now, I have huge problem with my WhatsApp app.  When I try to sent a photo, it takes almost 1 minute to actually attached that photo into my WhatsApp message.  At first it is not doing anything at all.  You thought it is faulty or buggy.

15.  When you try to DRAG a photo from your Photo App on the iMac into the Desktop, or Finder Windows it works.  That is because it is Apple OS stock program.  Now, it does not work when you try to drag that photo and want to include into Vimeo, Youtube, or even my usual blogging App, i.e. MarsEdit.  It just won’t work.  So, a way to get around it, is to drag the photo onto the Desktop, or any Directory Finder windows, and then, from there, you drag it inside your App or your Web App.  I think it is a bug.

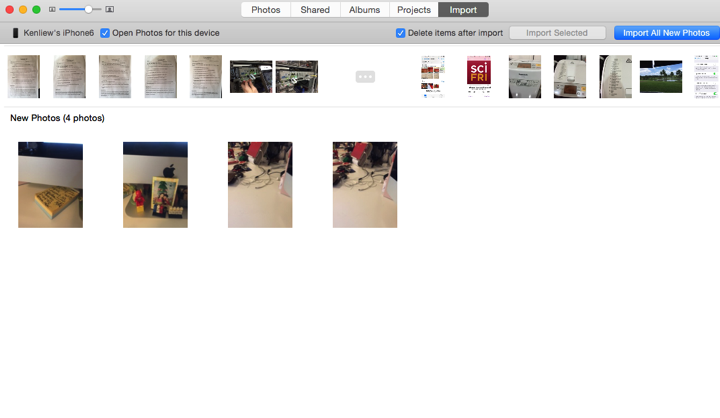
16.  When you plug in your iPhone, and you got new photos to import, you can click on “Delete Items after import”.  That will remove these photos from the iPhone.  If you forgot to click that?  Hmmm… you will have tons of photos on your iPhone and cannot be remove intuitively.
Screen Shot 2015 04 14 at 8 06 01 pm

17.  For example, these are the photos “Already Imported”, in the iPhoto App, I can select an option to “Remove imported photos from iPhone”, but here in the new Photo I cannot find that feature.  That is bad.  And the only way to do it is to go into your iPhone Photo App and select them one by one and delete.  There is also no way to have “Select All” button.  hahahahaha

Screen Shot 2015 04 14 at 8 07 13 pm

18.  My Photo Album is now a mix of iPhoto’s Albums & Events.  All those previously events are now placed in the Albums for me.  That is bad too.  Now, I have to one by one delete these extra Albums (Events) that I don’t want.  2609 Albums.  hahahaha.

Screen Shot 2015 04 14 at 8 11 35 pm

19.  Some one share photos using photo stream, you can select to “Import” it into your library.

Screen Shot 2015 04 14 at 8 17 57 pm

20.  Now, if the person sharing the photo to you is sharing an OLD PHOTO, the import function will place that shared photo into the correct date under Event.  It does not import as “New Photo”.  The problem will occur when you import and you cannot find where the Photo is located inside your Photo Library.

Screen Shot 2015 04 14 at 8 18 28 pm

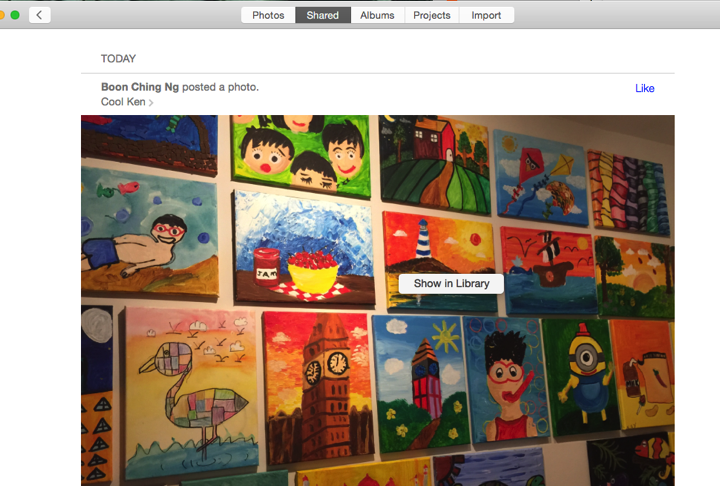
21.  So, what you should do is to go back to the Shared folder and then right click the photo you just imported, and there will be “Show in Library” option appears.  click on it will bring you right to the Moment of that photo.  i.e. the correct date.
Screen Shot 2015 04 14 at 8 21 48 pm

After playing around with all these new settings here is my recommendation.

A.  Since Apple decided not to support iPhoto, so the best bet is to use the new Photo App.  Soon or later, you will need to migrate into it.

B.  I am not recommending to use “iCloud Photo Library”.  I am so stupid, at home, I already complaint and not using my iPhoto Library on my Synology.  And I have a Gigabits network at home.  I found it a bit slow, why I so stupid go and turn on the iCloud Photo Library and it has to use the public Internet, to upload all the photos onto the iCloud?  hahaha… everything seems so slow.  I don’t need all the photos in the library to be shared onto the iPhone or iPad.  

So, I finally after 3 days of testing the iCloud Photo Library, I turn off the feature.  And I will downgrade my iCloud back to lower disk space option.  (Yeah, they allow it).  And delete all the photos on my iPhone and iPad.  Turn off the iCloud Photo Library on the iPhone too.  And plug in my iPhone to the iMac and import those that has not been imported to my iMac Photo Library.

As soon as I have done this, my WhatsApp become fast again!  I am happy again!  hahaha

IMG 0838


Friday, July 4, 2014

How To Watch World Cup

Date:  July 4, 2014

Note:  This blog entry is for education purpose.  Once you learn it and satisfy your curiosity, you may delete the program.  :)  Some friends asked me how to do it.  So, I decided to write a tutorial on it.  Of course, when you subscribe to ViewQwest Broadband Service, ViewQwest might already given you a IPTV box (looks like Apple TV box) which they have iTV player installed on it.  But just in case, you want the iTV Player to be installed on your iPad, here is how to do it.


This month is World Cup fever.  

NewImage

Here is how you can watch World Cup on your iPad.  And Hence, you can AirPlay it to your big screen TV using Apple TV.


**********************************************************

REQUIREMENT

You must have ViewQwest Freedom VPN service.  Means, you must have ViewQwest Broadband Internet service and you must subscribe to ViewQwest Freedom VPN service.

If you do not have the above ViewQwest service, then, an alternative is My Republic VPN service or some third party VPN service.

ViewQwest Freedom VPN is pre-configured on your ViewQwest router.  So, you need not to do any configuration.  

**********************************************************

1.  The World Cup as well as a lot of English TV drama are available free on ITV Player or BBC iPlayer.

2.  But when you go and download ITV Player or BBC iPlayer from your iTune Store, you may not find these two programs.

3.  The reason is because it is available only in iTune Store in United Kingdom.

4.  Both iTV Player & BBC iPlayer are FREE.  So that means there is a way you can download it without paying it.

5.  That means you will need to have an UK Apple ID in order to logon to the UK iTunes Store to download both iTV Player & BBC iPlayer.


Creating UK Apple ID

A.  On your iMac or PC.  Launch iTunes program.

B.  Select iTunes Store.  If you are login, you will see your Apple ID on the top left navigation bar.  Click on the Apple ID and select "Sign Out".

C.  Scroll down to the bottom, and on the bottom right, you see a flag round icon.  It may be either a Singapore flag, or US flag or other country.

D.  Click on that flag.

Screen Shot 2014 07 04 at 8 38 00 pm

E.  Scroll down, until you find the “United Kingdom” flag.  The UK flag is in Europe section, of course.  Click on it.

Screen Shot 2014 07 04 at 8 38 32 pm

F.  On the search field, key in “iTV Player”.  Then, it will find everything might related to "iTV Player”.  iTV Player is listed as "Free”.  Click on the “Free” button to download it.

Screen Shot 2014 07 04 at 8 44 03 pm

G.  Immediately, iTunes Stores will ask you to login.  But you do not have a UK iTunes Store account, so, you will need to click on “Create Apple ID”.

Screen Shot 2014 07 04 at 8 44 16 pm

H.  Click “Continue” on the next page.

Screen Shot 2014 07 04 at 8 44 28 pm

I.  Check the box “I have read and agree to these terms and conditions”.  And click “Agree” button.

Screen Shot 2014 07 04 at 8 44 53 pm

J.  Key in your Apple ID details.  And click Continue.  Now they have stricter rules to create password.  Make sure it has a upper case, a number, and not so obvious english word.

Screen Shot 2014 07 04 at 8 46 35 pm

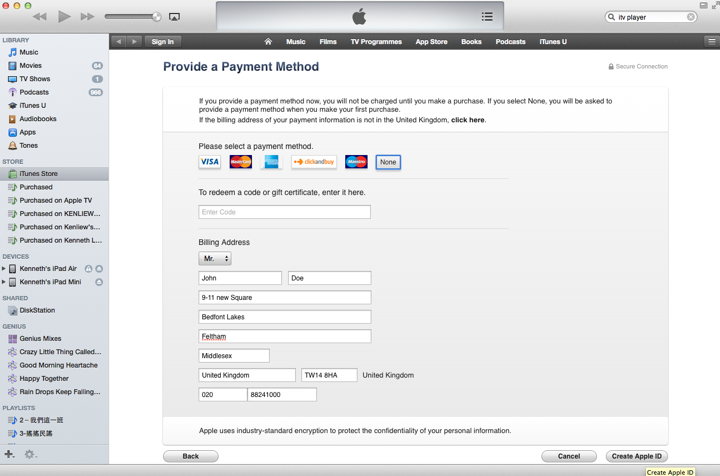
K.  The most important step.  In the Provide a Payment Method page, select “None” payment method.  Key in your details.You may use the following info.  Or any UK address you can search from the web.

Screen Shot 2014 07 04 at 6 39 03 pm

L.  And click “Create Apple ID”.

Screen Shot 2014 07 04 at 8 49 06 pm

M.  You are done.  

Screen Shot 2014 07 04 at 8 49 27 pm

N.  Now, go to your email client, and see the email Apple just sent you.  Click on “johnVerify now>"

Screen Shot 2014 07 04 at 9 10 02 pm

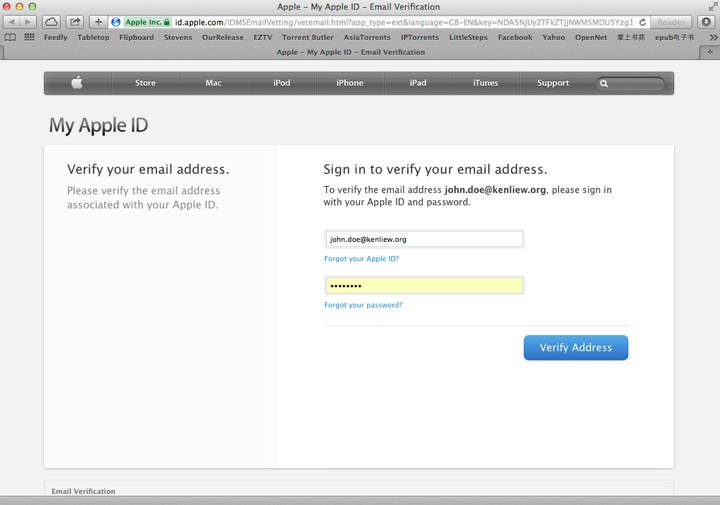
O.  Now, as for the last step, you simply login with your newly created UK iTunes Store Apple ID.  Click on “Verify Address”

Screen Shot 2014 07 04 at 9 11 40 pm


6.  Now, after you have created the UK Apple ID.  You can now download iTV Player or BBC iPlayer from iPad.  

7.  To do so, you will need to “Sign Out” from your existing Apple ID, and key in the newly created UK Apple ID.

8.  Now, iTunes store will recognise that the Apple ID you just log in can be used for UK iTunes Store only.

9.  Search for iTV Player and BBC iPlayer, and download them.

10.  When you first launch iTV Player, they will ask you to key in the Postal Code.  You can key in "TW14 8HA” which is a valid UK Postal Code.

11.  And you are done.  You can now watch all the UK shows on these two iPad App.

12.  Best of all, you can always click the “AirPlay” button to stream this onto your big screen TV via the Apple TV.  Yeap, you must have Apple TV on this.  If no, then, watch it only on your iPad lor.

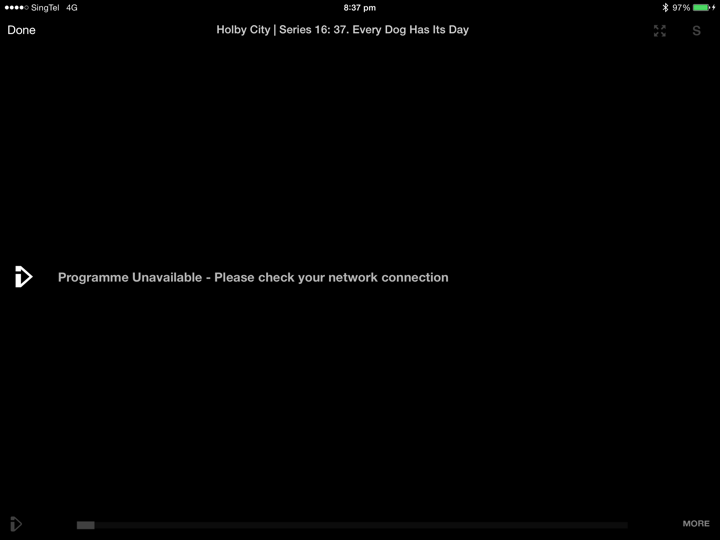
13.  If you do not have ViewQwest Freedom VPN, when you click on Play to play the movie, they will give you “Network Error” message.  You need to have a UK IP address in order to play all these iTV or BBC movies and TV programs.

iTV Player gives you this.

IMG 0166

BBC Player gives you this error.

IMG 0168

Oh ya… the video streaming is adaptive to your network speed.

So, when you first launch it, it will be like SD quality, then, when they find out that you can stream high bandwidth, then, they will push you the HD quality.


14.  Happy viewing! 


At home, I got many ways watching the world cup.  I can watch it on my ELTA Sport Channel (Mandarin) or TVB (Cantonese) which is on my Minix IPTV Android box.  I can watch it on CCTV5 on my YunOS IPTV Android box.  I can also watch it on my iPad using iTV Player.  

Also, I found that different streaming will have different lagging time.  iTV is still the best.  It also been tested out that MIO TV is few seconds lag behind iTV streaming.  That explains why some of your neighbour scream “Goal” while your MIO TV still not seeing any goal.  Wahahahhahaahahahaha
IMG 0170