Showing posts with label Good Info. Show all posts

Sunday, February 7, 2016

Gadget Notes - Automatic OBD-II Adapter

Date:  Feb 6, 2016

Your car will give you a dashboard of info in front of you.
You will know what is the speed you are driving.
You will know your mileage.

Would it be nice if you can have more information displayed to you or more information or statistics collected for you so that you can know what is your driving habits, etc.

This is the toy I bought from Amazon.  You can buy from their website too.


It is basically a car adapter, connecting to the ODB-II port of your car and poll the statistics.
It also connect to your mobile phone, I.e. IPhone via Bluetooth.  The good thing about it is that it will collect the data and then, upload it to your account @ Automatic web site.  So that you can know all the driving statistics in your finger tips.


This is how the ODB-II car adapter looks like.  Now, it might be a challenge to find where is the matching ODB-II port located in your car.
One of my friend still up till today could not locate the ODB-II port.  This is usually used by the mechanics who wants to run diagnostics on your car.  So, sometimes it is hidden in the secret location.  Mine just located just in front of my gears.  And it is hidden inside a compartment.


Unfortunately, this product is created for the US market.  So, there are a lot of features that is US centric.  For example, if you crash your car, it will know, and it will automatically dial the emergency number that you pre-store on your phone.  Remember, it always connect to your phone via Bluetooth and you usually have 4G data on your iPhone.

If you felt something is not right with your engine, usually all the error codes will be presented here.


Take note.  Works in US only.


This adapter connects to your car and phone automatically when you start your engine.


It will keep for you trip reports for all your driving.  I.e. How far is the journey travelled.  And how much petrol it costs you.  Unfortunately, it is designed for US market, therefore, some of these info might not be useful to me.


If you plan to buy this, take note.  It works in US only.
When you configuring the adapter, it asked you to enter your car VIN number, (Chassis no). 


This is where they knew your car is not bought in US.
So, what do you do?  If you want to take the risk to use this adapter with your car, and although you might not get to use the full capability of the device (since it is designed for US cars).
1.  Write to the Customer Service.
2.  Tell them that you are from which country, what car you own, give them the year, model and the VIN number.
3.  Ask them to add your VIN "manually" into their database.
4.  Tell them that you are aware of this product works in US only.
5.  Tell them that you wish to take the risk to use it.
6.  Tell them that you understand some of the features cannot be used because it is used outside Singapore.

Then, they will add you.  I also found out that There is going to be a new beta testing for International use.  I think they will launch a few countries instead.  Might not included Singapore though...


This is the Automatic App running on iPhone.   The useful info is the distant travelled, equal to how much money spent.  They still use the US units and I have not found a way to change the unit yet.  The other piece of info is the "Hard Break" you have used in every trip.  They also tell you where you travel to and from.  Which is quite useful.


Another screen shots.  The features are quite limited on this iPhone App.


There are quite a number of App supports the use of Automatic ODB-II adapter.
Like this one, cost US$9.99, it's called Dash Command.
It provides more info.


They even estimates the CO2 emission of your car.
OK.  It also tell you the speed you are traveling.  Hmmmmmm.... Interesting...


More screen shots.


I have not really analyze the capability of this Adapter fully yet.  But I know it is very useful whenever there are data involved.

Data is important.  But sometimes can be a double edge sword too.  Hahahahaha

Have fun!


Saturday, February 6, 2016

Gadget Notes - Dyln Alkaline Water Bottle

Date:  Dec 5, 2016

I cannot tell you whether drinking alkaline water will help improve your health, body or not. 
It is up to you to "Google" the information.
I can only tell you what do I do at home.  And I believe in it.
I also have "Diamond Water" systems who suppose to break the water particles to smaller and easy to be absorbed by body.

And this recently, I think I saw on sort of "Kickstarter" page that some one has come up with a Alkaline Water Bottle.
What does the bottle do?  It produces Alkaline Water.
This is how the bottle looks like.
Stainless still with rubber grip.


It is marketed as "DYLN Living Water Bottle".
Hmmm... 316 stainless steel.  Suppose to be a high grade, high quality bottle.  
But the marketing message has a point.
"Reduce plastic"
So, you can have an excuse of buying for his high quality 316 stainless steel bottle to reduce the use of plastics bottle and save the earth.  How nice!


As it can change a normal water into alkaline water, of course we want to test it using the PH meter.
And indeed, it changed my mineral water which is neutral into alkaline water, see the PH color placed it under 8.5-9.0. 


And it comes with a very cool bottle cover.  I love it!


Inside the bottle, you can see that it has the diffuser.


You have to use these tools that comes with it to take it out.  It is called diffuser remove tool.


So, you can quickly assemble the tool.  It is easy to keep too.


So, you latch the diffuser using this tool, and then, take the diffuser out.


This is how the diffuser looks like.
Why do you need to take the infuser out?
1) when you have oily mouth and has used the water bottle and you wish to clean it with detergent.  Remember, do not wash the bottle with detergent when you have the diffuser inside.
2) when you have used up 400 refills, the alkaline diffuser will need to be changed.


You see the rocks inside the diffuser?  Those are natural rocks and it will turn your neutral water into alkaline water.


Let's look at the packaging and try to understand more.


Take note, it does not filter your water.  It enhanced your water by turning it into alkaline.  It also produce anti-oxidation so that it neutralizes free radicals.  Not sure what it mean.


There are many reports or proofs that drinking alkaline water may help.
But after using it for couple weeks, this is what I found.
The alkaline taste actually can make you thirsty.
As you become thirsty, it actually help you to drink more.
If you drink more water, it makes your body hydrated.
So, you become healthier?  Hahaha

My wife used it too.  And she said when she used it along with his Yoga class, some how it helps to get his body hydrated.  So that she won't feel too tired and wanted to faint faint like that.  


Here is the chart of PH of all kind of water comparing to alkaline water produced by Dyln water bottle.


Here is the marketing message.  Why we need Alkaline water?
As I said there is not many proof to prove that drinking alkaline water will actually make your body less acidic.  It still depends on things you eat every day, your dietary and the exercise that you do.


The vita beads - the magic behind making alkaline water.


I bought from their website and they deliver it to my place.  You can see the price on their web site.  Simply google it.

I also drink lemon water at home too.  Everyday I have a bottle of warm water added a few slice of lemon in it.


Tuesday, February 2, 2016

NTUC Home Services 6788-8788

Date:  Feb 2, 2016

NTUC Home Service Hotline:  6788-8788

Thank you my friend Chester for recommending me this.

This is a handy number that every one should keep at home.

If you have any problem with the electrical system at home, normally you will call the contractor and hope his electrician is around to help you to fix the problem.

But, so close to Chinese New Year, you might have problem finding one.

IMG 0243

So, we picked up the phone and call.

You don’t need to be a NTUC member to call this number.  Anyone can call.  And it has 90-day warranty, whatever it means.

Screen Shot 2016 02 02 at 10 34 55 AM

They are like superman.  They will fix every thing for you.  Of course supplied by different vendors.

Look at their whole list.

Screen Shot 2016 02 02 at 10 35 03 AM

So, yesterday my wife called the number.

Our electrical ON-Off switch is spoiled.  She bought a new one from Hardware store for $7.90.

The hotline says it is very close to Chinese New Year so it may takes some time to find.  30 minutes later, a guy called and says he can make it on 9:30am the next day.

And the guy came to fix and replace it.

IMG 0236

At one point, the screw holder was broken, so, he went downstairs to take his drill.  And make a new hole.

Spent about 20 minutes and he got it replaced.

Nice and new.

Good workmenship.

IMG 0242

And the charges are $43.  Wow!  That is cheap.

The workmanship is $25 and the transport is $18.

And this is a company from High Land Electrical Co at North Bridge Rd.

My wife called to Brighthouse to ask for assistant, they quoted $75 without material.  

So you compare, the service from vendors of NTUC Home Service is nice!

IMG 0237

And the transport fee tariff is published.  So, they cannot over charge you.

Screen Shot 2016 02 02 at 10 32 56 AM


This is the first page of their practise notes.

Screen Shot 2016 02 02 at 10 44 50 AM

Happy customer.


Thursday, January 14, 2016

The Mighty Duct Tape (Speed Tape)

Date:  Jan 14, 2015

It is often mistaken as a “duct tape”.  But it looks very shinny.  

Yesterday, we came home on this Jetstar plane.  And to our surprise, we saw this!

Duct tape!

For don’t know what reason, Jetstar actually uses the duct tape to path the engine/turbine together.  Seems like it.

Indeed looks very very scary.

But we arrived home from Hong Kong to Singapore safely.

The ride is very smooth.  Should we thank the duct tape?

IMG 0075

Today, I get the chance to search on the Internet - keyword “Jetstar duct tape” ...

And I found this video.

Source:  http://www.gizmodo.com.au/2013/01/watch-an-engineer-repair-a-jetstar-plane-with-gaffer-tape/

WOW!  Jetstar!!!!!!!!!  Why????? Always use duct tape to repair your airplane?

Wait now...

Let’s search “Budget Airline duct tape"

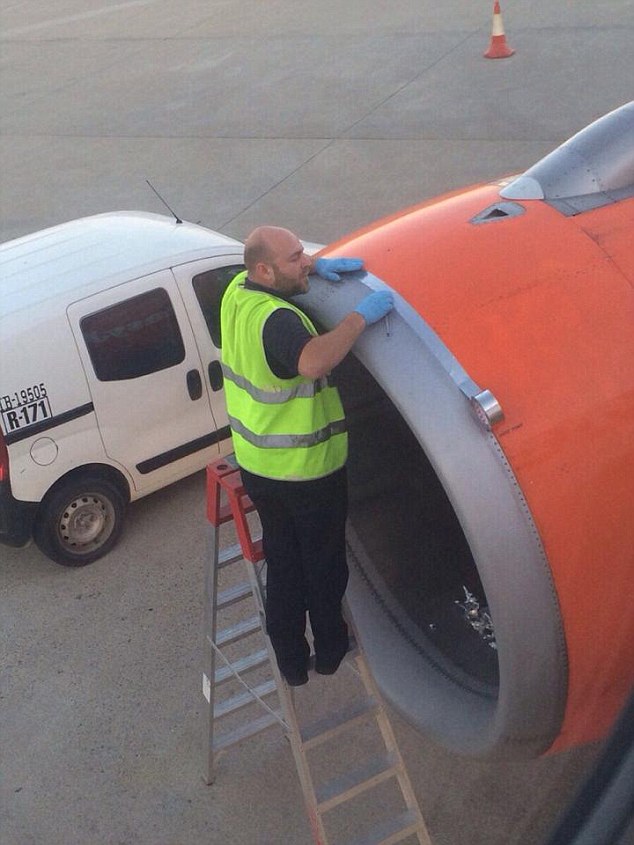
So, it is not only Jetstar.  This is EasyJet.  But they have explained why they need to use this.  It is not a duct tape.  It is called a “Speed Tape”.  It is a common thing in airlines industries.

Source:  http://www.dailymail.co.uk/travel/travel_news/article-3102312/Shocked-passenger-takes-photo-airport-worker-using-TAPE-engine-shell-easyJet-plane-moments-off.html

292CAA0700000578 3102312 image a 1 1432898111156

Tiger Airline not too bad.  Use duct tape to stick the windows back.  Make it more firm.

Source:  http://forums.vr-zone.com/chit-chatting/3232351-my-window-tiger-air-flight-hong-kong-singapore.html

AbyOjQ8 700b

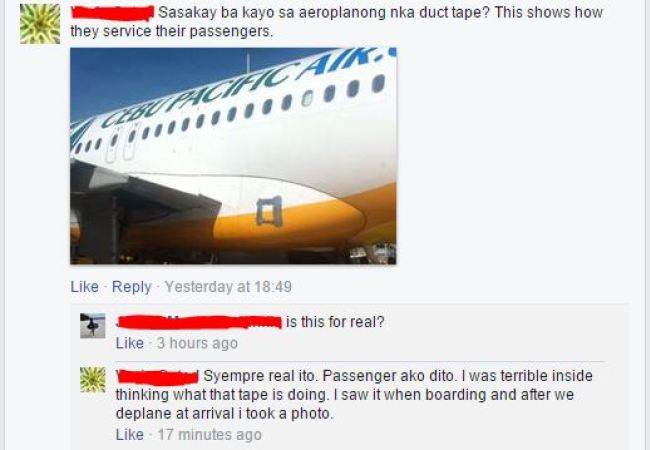
Cebu Airline fix a bit minor problem using duct tape.

Source:  http://hotels-in-cebu.com/duct-tapes-on-cebu-pacific-plane/

Cebu Pac Duct Tape Post 1

OK.  Wait now….

Let’s try to search “Singapore Airlines duct tape"

And… Singapore Airlines also uses it.

The airlines engineers knows that they doing.

Of course they have calculated all the odds and making sure that the plane flight is safety.

Using duct tape or speed tape to repair the airplane is acceptable.

Wrong use of duct tape o 271806

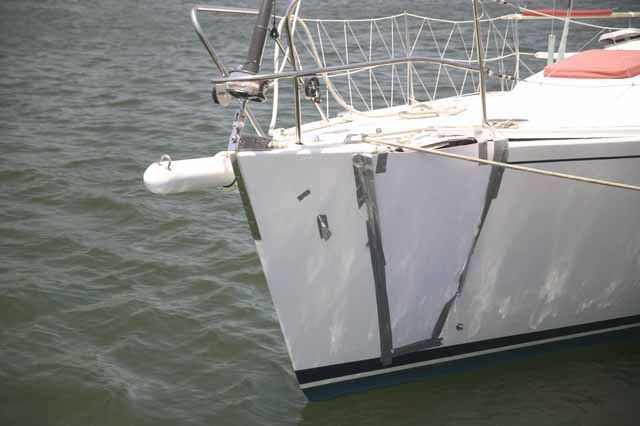
It can be used to repair boat too.

DuctTape

And cars too.

4d2c0cf95b878cdf6eaf8a124bb00129

Something to think about.  hahahahaha

Friday, October 23, 2015

Old Photos Equal Memories

Date:  Oct 23, 2015

I bought a new gadget.  Jumbl High Resolution Digital Scanner.

It scanned old photo film (Kodak or Fujifilm) into digital photos.

IMG 2434

I bought it from Amazon.  US$99 + shipping.  I am a Amazon Prime member, so local shipping in US is free.  Borderlinx shipping from US to Singapore is about US$24.


Screen Shot 2015 10 23 at 11 56 31 AM

unboxing it.  It has the power adapter, the USB cable, the film (big or small) or slides container, and the Jumbl scanner itself.  Very simple packaging.

And a TV output cable.

IMG 2435

The film scanner feels very light in your hand.

IMG 2436

Very simple control.  Basically OK button to say OK, left right button to navigate or flip or mirror flip the photo.  And the scan button.

IMG 2437

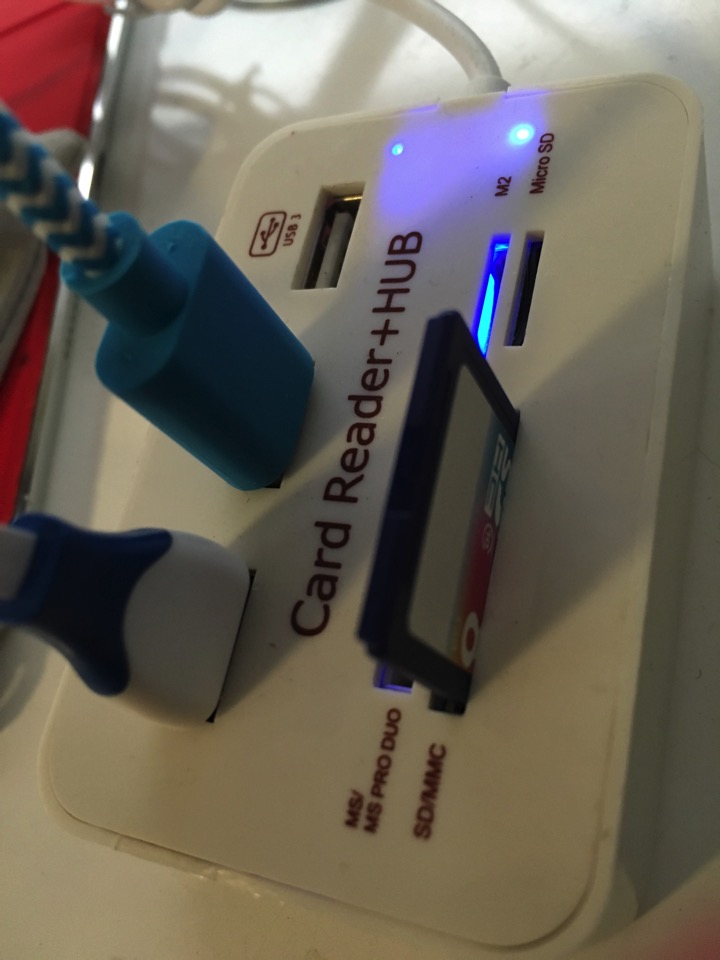
You can plug in the SD card.  (IT DOES NOT COME WITH SD CARD), whatever you scanned will be scanned into the SD card.

You can output the photo onto a TV screen.  Or you can plug the USB into the computer and use whatever software to view the photos.

IMG 2438

Let’s get ready my old photo films.

IMG 2439

Open the compartment of the film container.  Fit the film onto it.

IMG 2444  1

You will notice that the rails on both side of the film will click and fit nicely onto the container.

IMG 2445

Close it, and you are good to go.

IMG 2443

Just slot in this film container to the scanner like this.

IMG 2446

Turn on the scanner.

IMG 2440  1

Move and position the photo container correctly.  And simply press SCANNED button.  Oh ya, make sure every time when you turn on the scanner, set the photo resolution to 22MP.

IMG 2442

You can see from he LCD screen your photo you just scanned in.

What this device is actually a camera inside and you place the film on to a lightbulb.

IMG 2448

Once it is done.  All the photos are saved onto the SD cards.  So, unplug and SD card and plug into your computer to read the SD card.

IMG 2449

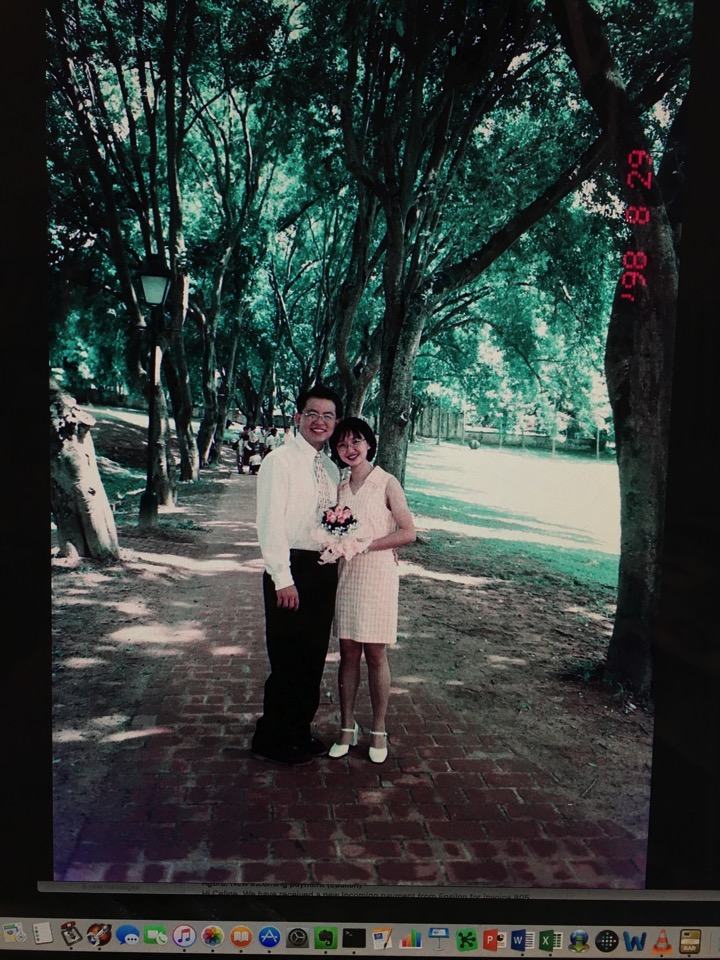
Every photo is 4032 x 3024 in pixel sizes.

IMG 2451

But most of the photos are quite yellowish.

IMG 2452

That is why you need the Photo app on Mac (For PC, use the one you familiar with).  Photo app can do a lot of amazing thing.

IMG 2458

Change the white balance, change light exposure, contrast, or simply press the AUTO button in each modification… 

IMG 2464

So, you remove the yellowish color, and it becomes like this.  Or you can change it to much vibrant color.  I like it this way the natural grey.

IMG 2463

Compare to the photo I scanned from the actual photo itself.  It is much smaller.

IMG 2455

The resolution quite sucks. (this photo is the actual size I took from my iPhone without enlarge it).

IMG 2456

This is the big scanned photo I just scanned and change the color.

IMG 2467

After the editing, this become a new album in my digital photo collection.  And look at the color is much better to my taste.

Also all photos are scanned into Jan 1, 2011.  I don’t know why and there is no way to change date.  So, select all the the scanned photos, and go to Menu to select Image -> Adjust Date and Time… and you can mass change all the dates.

IMG 2468

Scanning old photos is a quite fun work.  I can now sent this photo to my brother’s friend.  hahahaha  His 17 years ago photos.

IMG 2466

It is portable.  I will bring this home to my mom place one day and get all his film and scanned it for her.

IMG 2469