Showing posts with label recipe. Show all posts

Sunday, July 17, 2011

Cook with Ken - A Simple Meal

Date:  July 17, 2011

IMG_8323.jpg

It's a nice day, and just now went to Fireflies Organic farm saw these two interesting sauces, bought it, and let's cook tonight.  It is Red Yeast thick sauce and Red Yeast sauce.  Red Yeast is a chinese remedy for lower cholesterol.

IMG_8285.JPG

Tonight's menu is "Egg Omlette, Curry Fish Head and a Fried Vegetable"...

1.  Egg Fu Yong

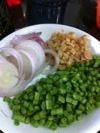
Here are the ingredients... 4 eggs, put some of the red yeast sauce in it, and beat it.  Soak some dried shrimp with hot water, later, take it out to squeeze dry it, and then dice it.

IMG_8287.jpgIMG_8288.jpgIMG_8289.jpgIMG_8291.jpg

Have some long green bean (长豆) and dice it too.  Lastly, chop some onions.

IMG_8290.jpgIMG_8292.jpg

It is one of the most easy dish.  You can actually put anything you like into it.  Put some olive oil into the hot pan, and then fried the onion, followed by the dried shrimp, as well as the long green bean.  Put the egg in, when it is almost cook, turn over the egg.  Until it is fully cook (not too overly cook thou).  And there you have it...

IMG_8293.jpg


2.  Stir Fried Vegetables

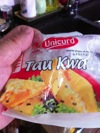
Prepare some seafood bean skin.  Leave the half for the fish head curry.  Prepare and cut some Tau Kwa into cubes.

IMG_8294.jpgIMG_8295.jpgIMG_8304.jpgIMG_8303.jpg

Also soak some dried shrimps and then dice it.  Dice some garlic.  And then, prepare some Red Yeast Thick sauce and some basil leaves.  If you do not have Red Yeast Thick sauce, just replace it with oysters sauce or abalone sauce and then finishing with a teaspoon of Chinese cooking wine.

IMG_8305.jpgIMG_8296.jpgIMG_8307.jpgIMG_8301.jpg

Heat the wok, put in olive oil after the wok is heated.  Let the oil come to boil, and then stir fried the garlic into golden color, then, put in all the ingredients inside... and stir fried it...
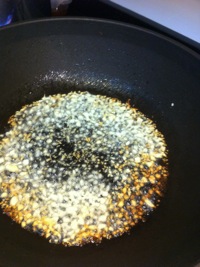
IMG_8306.jpgIMG_8310.jpg

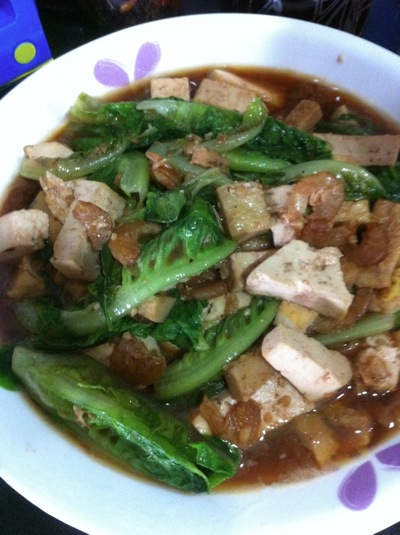
Put in some basils... and continue stir fried it... Lastly, put in the vege... stir it for 1 min, and then put the cover to simmer it for 1min.  That's it.  don't overcook, leave a bit crunchy in the vege...

IMG_8311.jpgIMG_8302.jpg

This is the Red Yeast Stir Fried Vege... the red yeast smell really good...
IMG_8322.jpg


3.  Curry Fish Head

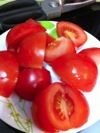
The last dish also easy to cook.  Some onions, tomatos, lady fingers, basil...

IMG_8297.jpgIMG_8298.jpgIMG_8300.jpgIMG_8301.jpg

Some seafood bean skin, fish head and some egg plants...  I uses some Atlantic Salmon fish head, and then the rest are the Ngo-Hu (Sesami Fish in Chinese direct translation) fish head too... Some times if you can have Tuna fish head also can.  Usually, I will use a few.  And I also throw in some fresh fish maw.  :)  Can you see the really red meat of the Atlantic Salmon... Not sure it taste good or not...

IMG_8295.jpgIMG_8315.jpgNewImage.jpgIMG_8318.jpg

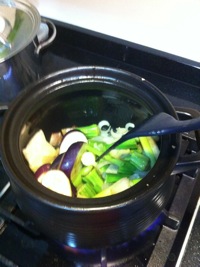
Of course, I just simply pick up some Fish Curry Paste, such as this one.  Then, you heat up your clay pot.  Put some olive oil, put in onion to stir fry for 1-2 min.  The, put in all the ingredient except the fish head and the curry paste.  Stir fry everything for 3-4 minutes.

IMG_8299.jpgIMG_8312.jpg

Then, you put in the curry paste.  Continue stir fry for another 1-2 min.  Until the curry smell are all out.  Don't over cook the curry here.  Then, put in 400ml-600ml of water into the pot.  Bring it to boil.

IMG_8313.jpgIMG_8314.jpg

Home cooking is always very exciting, as you can decide yourself how many fish head you want to put in.  I placed it 4-5 fish head into the pot, so that I can make the curry super sweet and tasty.  That inclusive of a fresh fish maw.  :)

IMG_8319.jpg

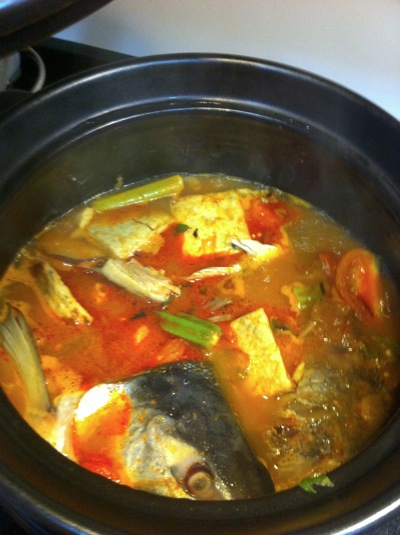
Turn into medium and small fire, so that you can simmer the fish curry for about 10 minutes.  All the fish should be fully cooked, and then, here, this is where you going to do magic...

1.  See if you need more salt?  Put in if needed.

2.  See if it is tasty, not tasty, put in a little bit of sugar.  (sometimes fish not fresh, not sweet).  Or you can put in some abalone sauce too if you look.

3.  See if it is too watery.  If yes, mix some starch water, and dump it in.  Usually, I will grind some water chestnut, but since I forgot to put, so, will use starch in it.

That should fix the curry.  :)
IMG_8321.jpg

And there you go... 简简单单又一餐.  By the way, you only need 30-40min to cook all three dishes.  Preparations need some time thou... you now.. cut cut cut, dice dice dice, etc.


Thursday, June 16, 2011

Health Drink - 1 Glass a Day - 5-Greens + Japan Vinegar

Date:  June 16, 2011

If you really don't like to eat vegetables.  But you wanted to stay healthy and you felt you are a bit heavy.  This is how you can do it.

1.  First, you need a Power Juicer.  Jack LaLanne Power Juicer is the one I bought few years ago.  I think you can still get it from Robinson. You can use any juicer you like, but definitely choose one that can retain as much vitamins from the veggie or fruits skins, and yet give you a smooth silky taste / feeling.

NewImage.jpg

2.  Let's call it a 5-Green Drink.  It consists of

* 1x Green Apple

* 1x Green Pepper

* Few Celery stalks

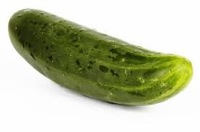
* 1x Cucumber

* 1x Bitter gord (small)

You can get all these from any Pasar or Supermarket.

http://www.fasting-for-weight-loss.com/fasting-juice-recipes.html

NewImage.jpgNewImage.jpgNewImage.jpg

NewImage.jpgNewImage.jpg


3.  Put all these into a the Power Juicer, and then, you shall have a full glass of 5-Green Juice.  I drank this on daily basis during weekdays, unless I am traveling.  This is my anti-hypertension power veggie juice.  It also can help to lose weight and detox too.  This juice is exceptionally good at preventing high blood pressure, cholesterol disorders and constipation.  I have been drinking this for almost 6 years now.  3-5 times a week.

NewImage.jpg

4.  Furthermore, you can buy from Takashimaya from basement store, the Japanese Black or Brown Rice Vinegar.  It is called Sakamoto Kurozu Tenju.  It is fermented and aged for more than 3 years.  (Bottle is golden color).  The aroma and mellow taste is much nicer than the 1 year and 2 years one.  (Trust me on this).  Kurozu means black rice vinegar.

http://www.kurozu.co.jp/eng/shohin.html

NewImage.jpg

So, what you do, is to put some of this vinegar into your juice.  The effect of Kurozu are in these reports and research papers.

http://www.kurozu.co.jp/eng/kenkyu.html

These are some article about vinegar helping to stabilized high blood pressure.

http://www.pyroenergen.com/articles09/high-blood-pressure.htm


Sunday, February 13, 2011

The Black Fungus in my Fuchow Red Wine Chicken Mee Suah

Saw a few posting from my FuChow cousins, making comment about the Black Fungus.

IMG_4508.jpg

I learned this from my uncle Yee Meng (the Ngooi's).  A few year back, I went to his house for CNY gathering, I also amaze and surprise he put the black fungus in.  After I tasted it, I found that the FuChow Red wine taste is in there mix with the strong black fungus taste creates a unique taste and unforgettable one.  Since black fungus is good for high blood pressure and your heart, so, ever since then, we will add it into our Red Wine Chicken soup.

IMG_4493.jpg

Here are quick steps to cook Red Wine Chicken Soup.  Since I need to go and pick up my Yu Shang, so, my wife will cook this dish.  And I am not around to take the step by step shot.  But you get the idea...

Step 1.  Slices (thin) a lot a lot of Gingers.

Step 2.  Marinate the Chicken with a bit of salt, a bit of sugar, a bit of soya sauce, and FuChow Red Wine.  Marinate 1/2 day.

Step 3.  Soak the black fungus for 1/2 day too.

Step 4.  Heat the wok hot.

Step 5.  Put sesame oil (note, not cooking oil) into the hot wok, let it heat up.

Step 6.  Put all ginger slices in there.  Stir fry it, and then slow stir fry it for a while until it turns golden color.

Step 7.  Put in Chicken into the wok, heat up and stir it.  until the surface of the chicken turn a bit white.  NOT FULLY COOK!!!

Step 8.  Pour in your red wine.  I cook 1 whole chicken.  So, I used 1 bottle of red wine.  for 8 people.

Step 9.  Bring it to boil.

Step 10.  Pour everything into a big pot, add water (thats for the soup).

Step 11.  Cook the soup until boil, then, slow cook it.

Step 12.  Cook for 30min-45min depending on how you like your chicken to be.

That's it!

When you serve it, don't forget to have a MARTELL VSOP there.  Add a teaspoon of Vsop.  Very nice.

I am glad everyone loves this dish at the party.  And make them have more guts when playing mahjong later. hahaha

The making of Liew Kee Lap-Cheong Chicken Rice (廖记腊味鸡饭)

Here is how you make the tasty Liew Kee Lap-Cheong Chicken Rice

IMG_4433.JPG

Step 1.  Marinate the chicken.  Use a bit of salt, a bit of sugar, a bit of soya sauce, a bit of chinese wine, a bit of oyster sauce, a bit of sesame oil, a bit of starch, etc anything you can think of to marinate your chicken.  Get fresh fat chicken from the wet market.  We need the oily fat to bring chicken taste into the rice.  Marinate it for half a day la.  (we are free in the morning, and then go shopping, and come back at evening).  Put marinated chicken in your fridge.

IMG_4480.jpg

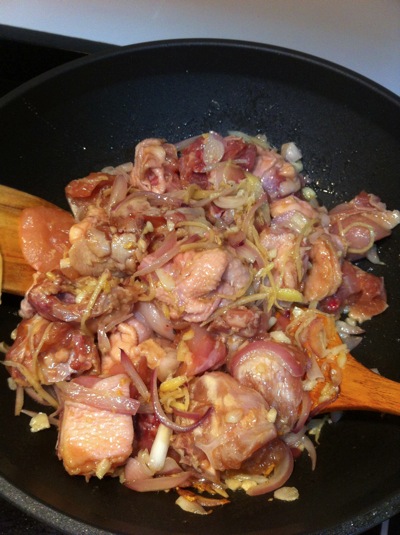
Step 2.  Prepare 3-5 small onions, 3-5 small garlics, 1 big onion, and a piece of ginger.  Dice the onions and garlic.  Cut the ginger into really thin strips slices, etc.  And the heat your wok.  Pour enough oil in the wok, let it heat up more, put everything (onion, garlic, ginger) into it, stir it, change to small fire to slow heat it.  爆香.

IMG_4481.jpg

Step 3.  I used 五加皮酒腊肠.  Normally can get the lap cheong from Giant supermarket.  I used grade A dried mushroom.  Those that grow on wood.  In the morning, soak the mushroom in hot water (a big bowl).  DO NOT THROW AWAY THE mushroom water.  As we need it to cook the rice later.  Cut the mushroom into slices.  Cut the lap cheong into slices.

IMG_4482.jpg

Step 4.  After you fried the onions, ginger & garlic (when they turned golden color), add in the Chicken.  Stir fry it.  (for 30sec to 1min).  The aim is not to cook the chicken.

IMG_4483.jpg

Step 5.  Add the lap cheong & the mushroom and continue stir fry it for another 30sec to 1min.

IMG_4484.jpg

Step 6.  Add DARK SOYA SAUCE (salty one or sweet one is fine).  Stir fry it for another 30sec-1min.

IMG_4485.jpg

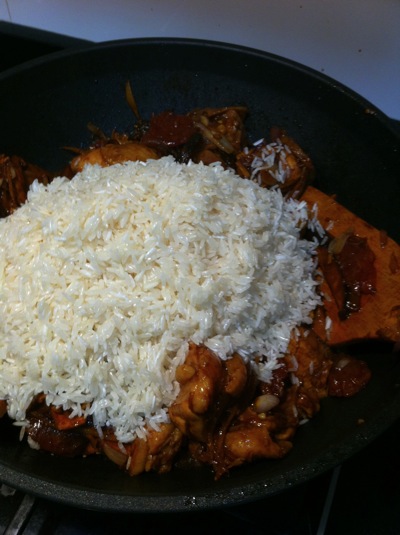
Step 7.  Forgot to tell you that you need to soak your white rice in water for 5min or so.  Do this before you start cooking.  Then, remove all the water, and then pour the white rice into the wok.  I prepare 4 cups of rice for 1 whole chicken.

IMG_4486.jpg

Step 8.  Stir fry for another 1min or so.  Until the rice covered by dark soya sauce.  Then, turn off the stove.  Prepare your rice cooker.

IMG_4487.jpg

Step 9.  How much water you should add.  Rule of thumb:  The water should cover slightly your fingers.  That is the height of water (remember?  you got MUSHROOM WATER) you should add.  Use this rule be it when you use rice cooker, clay pot or a pot on the stove, never go wrong (even cooking white rice).  But make sure you pad the rice, chicken nicely flat before you check with your hand.  Start cooking!

IMG_4492.jpg

Step 10.  After mid way (10min?), go check the rice cooker, and stir the chicken rice.  So that you do not have very dry rice on top.  and let the rice cooker continue cooking.  And then, you add what every decor you need.  Green onions, chinese parsley and fried onions (you can buy this from Cold Storage).