Showing posts with label Photos. Show all posts

Sunday, August 2, 2015

How I Manage My Digital Photos

Date:  Aug 2, 2015

[For Apple Mac Users only]

This is always a hot topic.  

But I think I have finally crack it, and I know what I should do to manage my photos and videos.

In the past, we use this.

Screen Shot 2015 08 02 at 6 05 27 am

Every time you have a camera in your hand with either 24 film or 36 film, human being knows what to do, by instinct.  

We post for the photos.

 DSC00093

When digital camera, smart phones camera comes in….

We took tons of photos naturally.

Screen Shot 2015 08 02 at 6 10 48 am

That means we took a lot of photos in sequence.

And all these photos are now sitting on your Photo App on your iMac.

Screen Shot 2015 08 02 at 6 10 27 am

Then, you will take lots of lots of photos.

kids drawing, you take.

iPad games, you take screen shots.

Every meal you have, before the meal, you feed your smart phone camera.

You end up with a lot a lot a lot of junk photos.

It is good to keep some of these sequences of photos.

Because it tells you about what happen in the event.

But seriously, 10 years later, do you really take a look at these photos again?

And if you end up > 100,000 photos like me, where do you even look for the photos?

Where do you even start to look for? 

Screen Shot 2015 08 02 at 6 03 05 am

I don’t know about you, but this has got to be stop.

So, I am still processing my photo events and album.

But I would like to share what I did.

How do I manage my photo App so that it does not get too big

I have almost 400Gb of photos in my photo app.  That is about > 100,000 photos plus videos.

So, I am going thru every photos.  Year by year, month by month.

It is going to be a long process.  But I am starting some where.

For example.

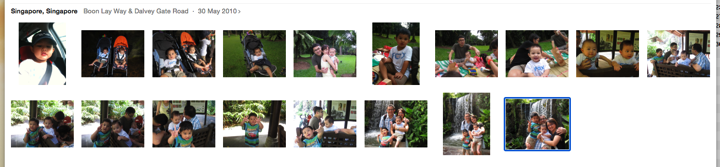
We went to Botanical garden on May 30, 2010.

It is great to have all these photos here.  Almost 90 photos were shot during that day.

But seriously, do you need to keep all these photos on your Album or Photo App?

Some photos are not focus.

Some photos are blur.

Some photos are not relevant.

And these the the photos that clog up your Digital Photo Album.

And sometimes, you run out of disk space because of you keeping so many photos.

Screen Shot 2015 08 02 at 5 39 48 am

Before you do this.  

You need to have a proven method to do backup for your photos.

All these photos are your precious photos.

So, you need to copy it somewhere that is safe.

But that some where is not really safe if you are talking about digital storage.

1.  I setup a Synology NAS (Network Area Storage) with the usual RAID 5 settings.  If anything wrong with the hard disk, simply pull out the hard disk which is at fault, and plug in a new hard disk (compatible one), the RAID 5 system will auto repair and populate all the data back.  Let’s call this Diskstation 1.

2.  I setup ANOTHER Synology NAS.  Called Diskstation 2.  Exactly the same way.

3.  All those photos I decided to keep, I will place it on to Diskstation 2. 

4.  I will create a YEAR directory.  i.e. Photos/Year 2010

Screen Shot 2015 08 02 at 5 40 07 am

5.  I will create a folder with date on it to describe the event.  i.e. Photo/Year 2010/2010-05-30 Botanical Garden with Terrence

Screen Shot 2015 08 02 at 5 40 24 am

6.  Take note.  You don’t any how go and upgrade the Synology firmware on both Synology NAS.  This is very dangerous.

7.  Whatever photos I need to keep, I will copy it onto this directory on the Diskstation 2.

Screen Shot 2015 08 02 at 5 40 47 am

8.  At mid-night, I run a cron job or backup job to copy the photos and videos directory over to Diskstation 1.  It is a dump copy.  

9.  Like this, I am very sure I have 2 copies of the photos I want to keep which is safely kept on the two NAS I have which doing daily backup.

10.  I also have a 2TB hard disk (those portable one) connected to my iMac.  And that is my Time Machine. It is doing daily routines backup on all my softwares on my iMac.  So, if something goes wrong, the first place I will look for is this Time Machine.  From time to time, I will but a new hard disk and plug it in to create new Time Machine.  Then, I will keep these old one.  Well, if something really goes wrong, you know you won’t lost every thing.

11.  Now, you can start editing, deleting the photos that you don’t want.  Only keep those that is very important to you.

Screen Shot 2015 08 02 at 6 01 39 am

12.  Guess what… after all the deleting…  I left with 18 photos that I like to have it in my Photo App.  There rest of the 70+ photos all removed from the Photo App.  But these photos are still in my Synology NAS.  So, you are not deleting it away permanently, instead you make a copy, and you delete it from the Photo App.
Screen Shot 2015 08 02 at 6 01 54 am

13.  If you can do so, you will be happy to see your total hard disk space for your photos are reduced may be 1/2 to 2/3.  That is a huge savings on hard disk space.  And my aim is to reduce the total photos down to 20,000 may be… for the last 10 years.

14.  Wait, we are not done yet.  Since you are editing and deleting these photos.  Mind as well tag it.  Tag your favourite, give it a meaningful tags.
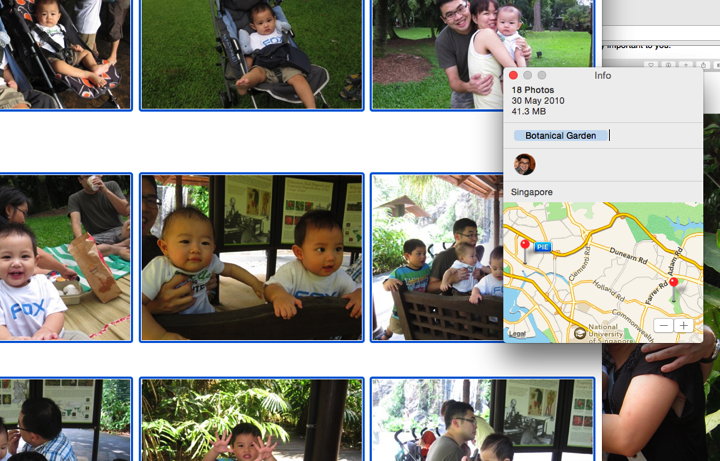
Screen Shot 2015 08 02 at 6 37 35 am

15.  Then, you go into individual photos and try to tag even more tags.  Why this is important, because, it helps you to find the photos fast.

Screen Shot 2015 08 02 at 6 38 58 am

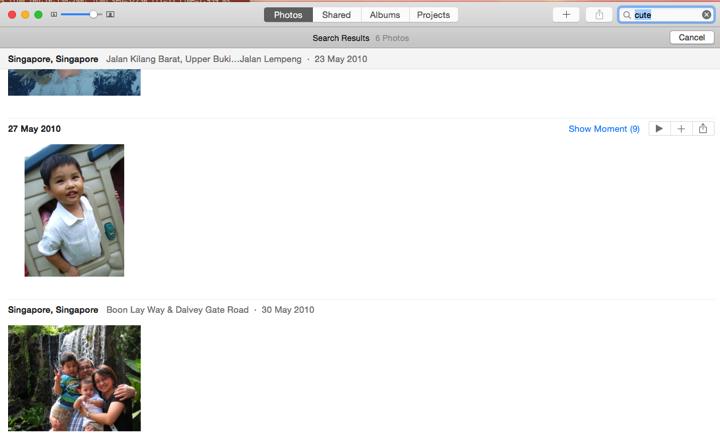
16.  So, now, if you type “cute” as a search item, Photo App will show you all the photos you have tagged “cute"
Screen Shot 2015 08 02 at 6 40 53 am

17.  It is an easy way to organise your photo, and do a quick search.

Screen Shot 2015 08 02 at 6 40 31 am

That concludes my latest thoughts on how to manage your digital photos.

I have done a few months starting year 2010.  There are a few more years to go.

Especially during the birth of iPhone.  

You cannot believe how many “Bad photos” or Blur photos I have taken.

Tons of it.

And I need to get rid of them.

Only choose up to maximum 5-10 photos for each even.  Longer event of course you can have more photos.

But only choose then that is relevant and that is good quality.

I will update again once I have completed all my photos for the last 6-8 years.

And will proudly show my achievement.  hahaha

Thursday, December 25, 2014

Hokkaido Trip with a Selfie Stick

Date:  Dec 14, 2014

I got this from Narita Airport, at one of the electronic store (left side).

I gave my wife this as her Christmas present.

And what do you know, she said this is one of the best Christmas present she ever had from me.  ?????  Hahahahahaha.

OK, it is a Selfie Stick.  It is 2,980yen and there are also version for Android + iPhone other model. (Yellow Color).

This product is so good that I end up ordering another 2 from Amazon, and bought another 3 from the same store during our return trip (luckily they replenish their stocks).

IMG 5975

What so great about this selfie stick is:

1.  It is light.  Very very light.

2.  It plugs into the iPhone’s headphone jack, and it comes with a button to take photo.

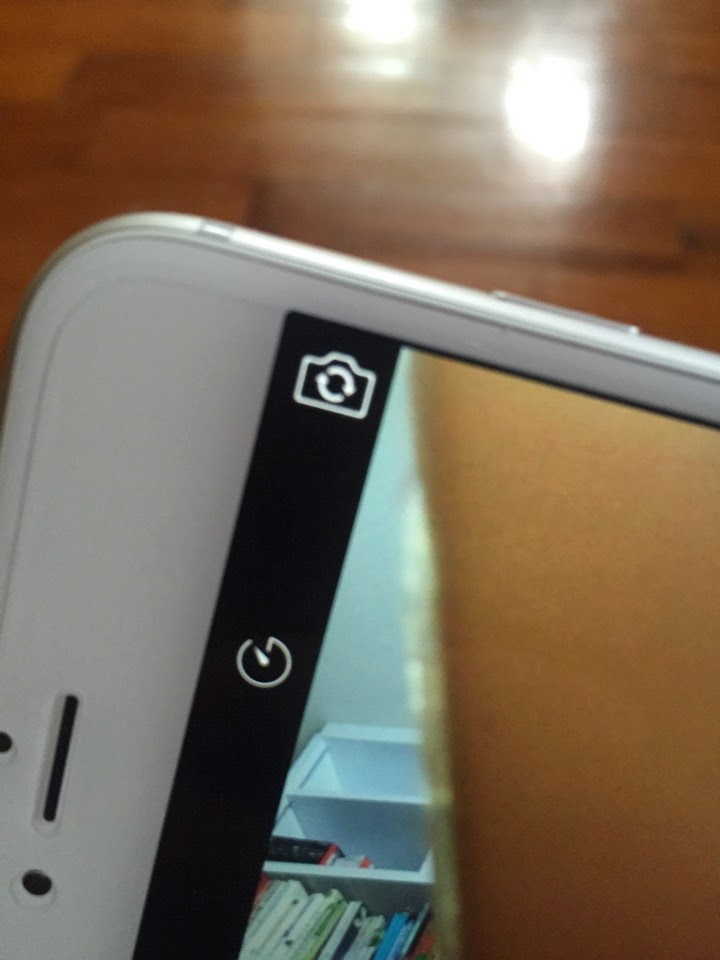
3.  It has a small mirror for you to see yourself to make sure every one is in the photos if you use the higher resolution rear camera.

Let’s take a look at the photos first.  Later will show you the features.

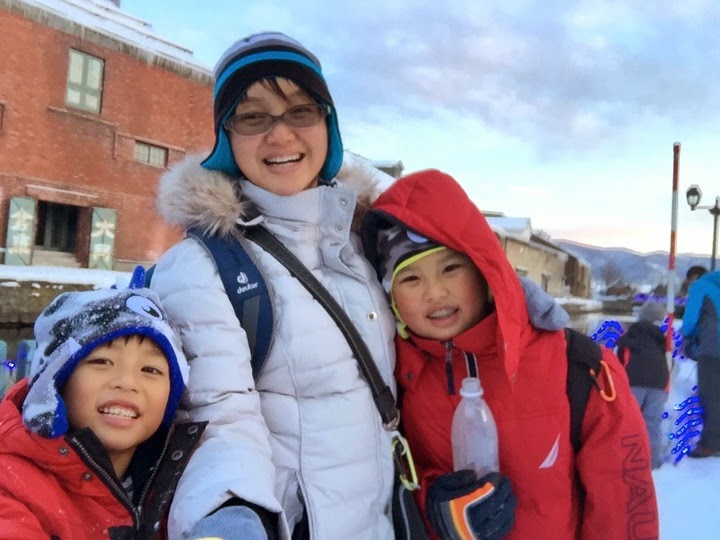
The kids love new gadget.  Asking them to take a selfie is always amazing.  You can get them gather them and take the photo.  Instead of asking them to stay still and take photo.

IMG 3392

You can fit more people in your photo.

IMG 3398

You can fit too wide background behind.  But the key thing is the people.

IMG 3399

You get the kids do all sort of amazing faces.  Because they can see themselves.  That is why they know how to pose for you.

IMG 3461

And you get more photos of you and your significant half.  Without asking 路人甲 to take it for you.

IMG 3480

More photo of yourself and your wife.

IMG 3498

With kids.

IMG 3511

With friends who is amazed with the gadget.

IMG 3513

More picture with your wife.

IMG 3522

You will know this is selfie when the arm is reaching out towards the camera.

IMG 3526

Most importantly, you can have more memorable photo about your family.

IMG 3530

Taking family photo is very important.  Because this is the only proof you can give to your children when they get older about spending money on them on vacation.

IMG 3541

You can take photo with your rear high resolution camera or with your front camera with FaceTime quality.  You can tell the difference.

IMG 3547

Taking selfie is the fun thing to have.  Shawn is using a different one.  With a bluetooth.

DSC00177

And my wife have to LOST it the next day.  I think she accidentally drop it while climbing back to the pine house.  May be at the train station, or may be in the taxi, etc.  So, she lost it.  And she has to use her old selfie stick which is 1) heavy, 2) must use another bluetooth devices to sync and take photo.  But still a selfie stick.  (and she lost my Moku bluetooth photo shutter the next day).

IMG 3613

Ok.  Let’s talk about the selfie stick.

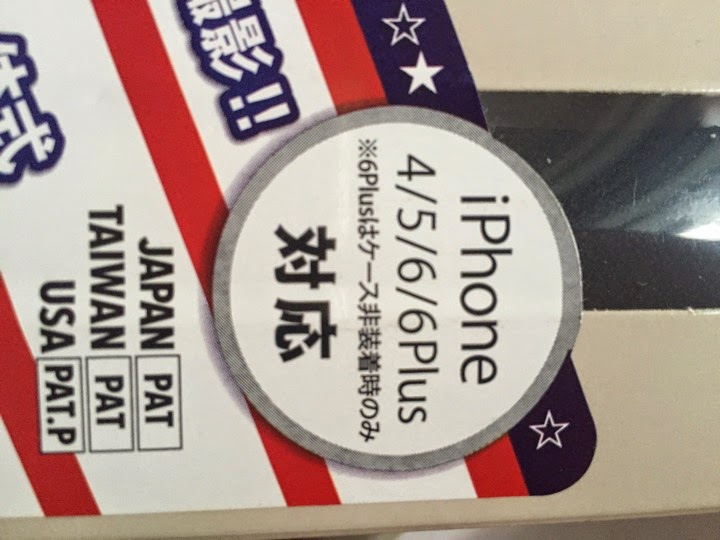
The one I am using is called Looq 2S.  This is for iphone 6/6 Plus.

Before my Hokkaido trip, I was quite negative and against of taking selfie photos.

Especially when I see people using it, I will comment it always.  Very funny, very bad comment.

There is this report that Korea are band the selfie stick that is with bluetooth.

But after I saw all the photos taking from the selfie stick, I changed my mind.

And I am recommending my friends to get it.

It really makes your vacation photos or any occasions complete.

This is a selfie stick.

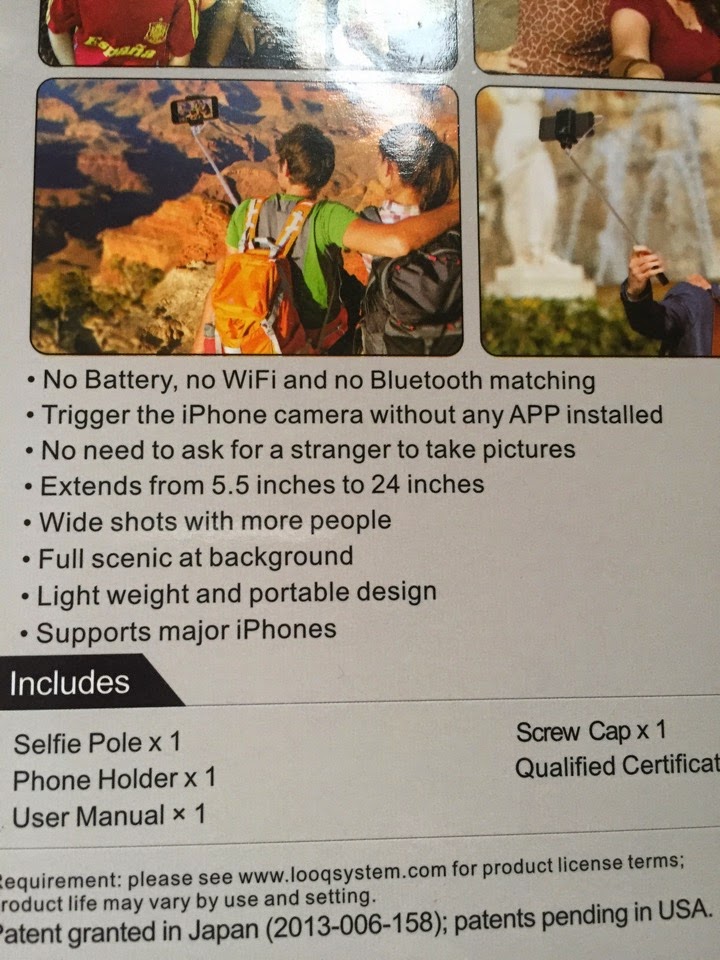
It does not have battery because it has no bluetooth or WiFi.  

That means this selfie stick can be used in Korea.  No hazard from bluetooth or WiFi.

That means this selfie stick is very very light weight.  It is about 3.8 oz.  (about 108 grams).

IMG 6132

All you need to do is to plug this into the iPhone headphone jack.  And then, press the button.

This is like you can take photo using your headset by pressing the volume control button on the headset wire.

IMG 6134

It comes with this fantastic small round mirror, that you can use when you use the rear camera on your phone.

Why do you need to use rear camera?

Because it is very high resolution.  

IMG 6135

It is amazing.  Just press the button.  You know what?

When you are in a cold country in winter, you don’t need to take off your gloves and you can simply press the button and take photos.  

Yup… no longer you feel cold taking photo with your gloves on.

IMG 6136

You can also use the front camera.

But the resolution a bit sucks. You need to take photo under bright sun lights.

IMG 6137

I love that mirror.

IMG 6138

You can extend from 5.5 inches to 24 inches.  About 2 feet length.

IMG 6139

You can take a lot of background with this distance.

IMG 6140

It is amazing is it not?

IMG 6141

Here is the packaging.

IMG 6142

It even hase patents in Japan, Taiwan and US.  

IMG 6143

So, remember to get a selfie stick.

And try to get this one as it is light, and it does not need to use bluetooth and wifi.  

Hence, no draining of battery on your iPhone.

Have a great holidays!

Sunday, November 3, 2013

Family Photos

Date:  Nov 3, 2013

I love to take photos for my family.

From time to time, we will always look at those photos we taken in the past together with my family.

We all remember the good times we spent together.

However, I found that something is really wrong.  Most of the photos are without me.  :)

Why?  Because I am the one taking photos.

And sometimes, we seldom bother other people to take photos for us.  And most of the time, we are alone and there is no one else taking photo for us.

Yes, we can use the blink blink timer to shoot photos.  But by the time the timer finished blink blink, your kids eyes already look somewhere else.

IMG 0690

With new technology, you can take instant family photos just as the word “instant”.  

“Jay & Kay, look at the iPhone (on a tripod) NOW!"

(and you click click click).

IMG 0718

But you will see my hand always holding a remote or the iPhone itself (for QX10 or QX100).

I can check the ViewFinder on my iPhone connecting to QX10 or QX100.  And then, 

“Kids, look at the camera NOW!"

(and I press the shutter button on my iPhone).  

IMG 0782

Now, you feel slightly complete as you are in most of the photos with the entire family.

IMG 0833

I took this on Jay Jay’s birthday meal.  That was the first time I use the Sony QX10 or QX100.

IMG 9158

How do I do that?

Buy the Muku Shuttr which is a remote shutter button for your iPhone (or Android).  

Muku Shuttr:  http://miniliew.blogspot.sg/2013/11/gadgets-muku-shuttr-very-small-mobile.html

Or you can buy the Sony QX10 or QX100 camera lens add on to your iPhone (or Sony Android).

Sony QX10/QX100:  http://miniliew.blogspot.sg/2013/09/unboxing-sony-cyber-shot-dsc-qx10-qx100.html

Both will do a fine job for you. 

Or you can use the Timer function on the traditional camera ...

Or you can use the remote shutter that comes with some DSLR camera.

But remember, once you shoot the photos, always print them out into photo books so that you can always take a look at them all the time.

Photobooks:  http://miniliew.blogspot.sg/2012/09/amazing-photobooks.html